Category Archives: Do it Yourself

DIY Butter Care Facial Treatment for Dry Skin

Butter Care Facial Treatment for Dry Skin (Do it Yourself)

by Chand

How much do you care for your skin?? All color cosmetics, concealers, enhancers; all these will suit you only when the skin is healthy and happy.  The more experimental you are with your make up, the more you need towards the happy being of your skin. I hope this fact is agreeable. 🙂

When it is winter, skin demands more and more attention. Slightest neglecting will make you pay for it. Seems like I am paying for neglecting the winter.  I was not very strict in my skin routine this winter, it has taken so many tolls, that my skin is breaking and there are red rashes of skin breaking. And it hurts too. 🙁

So, from past one week I am devoted very much to my skin. I have introduced the butter-care facial routine for my dry skin. I use freshly churned out home made butter for this routine. (I hope this is a well known practice in all Indian homes, churning the curds along with the skimmed milk cream brings out the yummy deliciously utterly-butterly butter. Excuse me for too much of rhymes. :))

  • Read: How to Make DIY Skin Hydrating Face Pack? [Photo Tutorial]

Butter massage for dry skin:

DIY Butter Care Facial Treatment for Dry Skin

Butter is the creamiest thing that is obtained as a product from milk. It is a rich moisturizer when used on skin. It forms a good massage cream helping the dry skin a lot. The dry broken skin gets soothed when massaged with butter for about 5 minutes or so.

There is lot of difference in the stored butter and freshly churned butter. The stored butter is of course good for skin, but before storing it is washed well to remove traces of butter milk. Thus the stored butter is only a good moisturizer.

Now if you are given a moisturizer along with the toner in the same product, wouldn’t you prefer the added bonus!! Same is the freshly churned butter. The traces of butter-milk present when you use the butter that is just churned out, is the perfect toner for the skin along with the heavy moisturizer.

Thus massaging my face with butter and little butter-milk is giving a lot of moisturizing to my dry skin.

Butter and sugar scrub for dry skin:

DIY Butter Care Facial Treatment for Dry Skin
  • Read: Winter Fairness Face Packs for All Skin Types

Winter leaves lot of dry skin flakes making the skin look dead. This has to be removed some how. So, I thought of using a sugar scrub. But sugar again needs a rich cream for scrubbing the dry skin. Else sugar alone will do more harm to the dry skin.

So, add a little sugar to some butter and leave it for sometime. Let the sugar dissolve for a while (not completely) so that the sugar does not form a harsh scrub particle. Now, we have a mild scrub in a rich cream base.

Do some scrubbing on the face for removing the dead skin from the face and neck.

Wiping with warm water:

I am not using a steamer for this facial treatment; since my skin is gone heavily dry. So, alternatively, I use a cotton cloth dipped in warm water to wipe my face. The greasiness of the butter may not go off completely with just wiping, but the skin will drink off all of it in some time. I do not mind if there is some oiliness left behind on my face the day I do butter facial.

Curd as face pack:

DIY Butter Care Facial Treatment for Dry Skin
  • Read: Homemade Suntan Remover with Curd

There is some amount of sour if you observe the hard creamy curd. I love that sour smell. When a spoon full of curd is applied on the face and allowed to dry, it forms a whitish moisturizing face pack.

This is a much needed face pack for my skin. I do not mix anything else to the curd, just plain curd, one table spoon and apply them all to the face. It forms a thick creamy texture initially on the face. It take about 15 minutes to dry after which I wash it off.

This entire procedure is helping my skin so much that it feels like my skin is winning over this cold season.

Did you enjoy my Butter Care Facial Treatment? Share your feedback below!

My Bed Time Beauty Routine to Wake Up Beautiful!

My Bed Time Beauty Routine – Steps and Tips

Hey Everyone!
What do you do before you go to bed at night? Watch television or go for a walk.. or munch something? Alright! what do you do to your skin and hair to wake up beautiful the next morning? Have your ever wondered about your bed-time beauty care? Fine, cool. I am not getting sleep now so came here to share my bed time beauty routine with you all. I have been waiting to make this post since long but missed it every time. Check below the steps of my beauty routine; these are what I do before I go to my soft bed every night 🙂 This routine really helps me wake up fresh, energetic and ofcourse confident. I have been following this routine for more than 2 yrs now and my skin and hair have been improved a lot after that. No long steps; these are just the normal ones which we can follow at our home easily. Let us move on to the steps now?

  • Read: My Step by Step Facial Skincare Routine Before Diwali
Night Beauty Care, Bed Time Beauty Tips

Brush Teeth & Clean Mouth

Brushing my teeth is the first thing I do every morning after I wake up from sleep and also before going to bed every night. I just can’t live without brushing my teeth at least twice a day. It is essential to keep our mouth clean in order to maintain good health and to avoid bad odour. So before going to bed at night, I brush my teeth with a mint toothpaste and goggle with a refreshing mouth wash following by the tongue cleaner usage. Get a baby tooth brush and keep it in your tooth brush stand. Once you are done with brushing your teeth, gently scrub your lips with the baby brush and wash away with cold water. This will make your lips baby soft!

  •  Read: Early Morning Skincare Routine for Glowing Skin


Warm Water Bath

However tired you might be, just have a warm water bath with your favorite fruity smelling shower gel. This will lift up your mood and make you energetic in minutes leaving all the dullness and tiredness behind. I usually have my night bath around 10 pm in lukewarm water. If you are afraid of getting cold, make it a quick warm shower. Having a relaxing warm bath at night relieves stress and refreshes you for a better sleep. Do you have those ‘slippery feel giving’ shower gels and bars unused, those will take ages to get washed away from skin completely? They may raise your temper in busy mornings; hence spare them for night baths! I love having my night bath with strawberry, pomegranate or citrus shower gels depending on my mood.

Tidbits: 

  • While having your bath, soak your feet in hot water (in bearable heat) for 5-10 minutes and scrub gently with a foot scrubber or a loofah pad. This will ensure the removal of dead skin cells and softens feet.I don’t do it everyday due to laziness 😛 but at least twice a week is really good.
  • Use a good makeup removing cleanser to remove all the makeup, dust and pollution from your facial skin. Removing make up is a must before you go to bed every night.
    • Read: Chandra Body Care Detox Bath Salt Review

    Moisturize Face and Body Skin

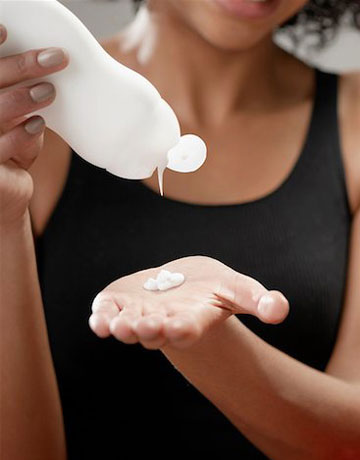
    Okay we had a warm bath now to refresh the body, senses and to remove the impurities, sweat and dirt from the skin. What next? The warm water with cleanser would have taken most of the moisture from our skin. To combat moisture loss, I put on my body lotion and face moisturizer soon after I come out of my bathroom. Wipe your skin with a soft towel and apply the moisturizers evenly over your face and body skin. Never ever use creams those others simply recommend because it works on them; everyone’s skin is different and you need the apt one for your skin. Heavy moisturizers are good for night usage as you need to keep your skin moisturized for next 8-12 hours (Do you sleep for twelve hours? 😛 I do many times!).

    Tidbits: 

    • Before putting on your facial moisturizer, spray some rose water or a skin toner over your face to tighten pores and remove the leftover dirt from your skin.
    • If you find any particular moisturizer that suits your skin the best, but still you can’t use that due to the ‘No SPF’ factor, spare it for night usage. I find few of my good working moisturizers turn dewy on my normal-oily skin after 2 hours of application and hence I don’t dare to put them for day use; but you see, they fit perfectly as my night cream.
    • Do not forget to apply your foot cream while moisturizing your face and body.

      • Read: Can You Use Body Lotion On Your Face?

      Apply Lip Balm or Lip Butter

      Our lips turn dry when we fail to moisturizer them. We are needing our lip balm many times in a day but many of us fail to think about the nights our lips face. We need to moisturize our lips heavily at nights, especially in winters if we want to wake up with soft lips instead of the dried and chapped ones. Soon after I moisturize my face, body and feet, the next thing that my hand searches for is a ‘lip balm’. I apply a thick coat of my lip balm or lip butter every night to ensure my lips won’t turn chapped. As it is night, try to skip the tinted ones and go for flavored ones to refresh your senses! How about a sweet vanilla or sheabutter one?

      • Read: Himalaya Herbals Natural Moisturizing Lip Butter Review

      Comb & Detangle Hair

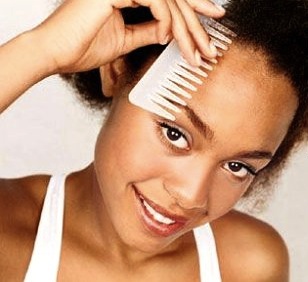
      This is one of the main steps of my bed time beauty (hair) care routine. I gently detangle my hair with a wide toothed comb and apply some oil on my scalp if in case I am planning to wash my hair the next day morning. It is highly risky to sleep with ponytails as they may result in thinning of hair or even alopecia in long run. So never ever sleep with tight braids or pony tails. Just detangle your hair and wear loose braids before you go to bed. If you havea  really short hair, then you can sleep with loose hair but in case if you have a lengthy hair, it is better to wear loose braids as the natural oils of your hair can cause pimples if comes to contact with the skin.

      • Read: 10 Essential Hairfall Rescue Tips

      Pillow Cover & Blanket – Are they Clean?

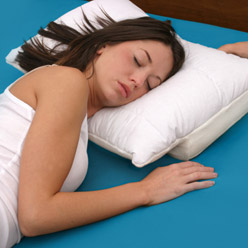
      Yes, I do check this every night. Most of the people, even if they follow a good skin care routine, experience pimples due to sleeping in pillows without making sure the cover is clean. They won’t be having a clue why they are getting pimples whatever anti-acne cream they use. Hence, it is better to wash pillow covers twice every week; this avoids skin problems, acne breakouts and other skin allergies. I always make sure that both my pillow cover and bedsheet are clean before falling asleep! Do you have this habit? If not, cultivate it for your skin sake from today itself.

      • Read: Acne Scar Removal at Home

      Relax Eyes with Cold Cotton Pads

      Be it cucumber juice or rose water,  I always have any one of these chilled and ready in my refrigerator. Once I am done with all the other steps of my night time beauty routine, I dip two clean cotton pads into rose water or cucumber juice, squeeze them and put them over my eyelids. Wow! What a relaxing feel it is! This method treats my tired eyes which works on computer for long hours everyday. Why don’t you try it too?

      • Read: Choosing Products for Eye Makeup and Eye Care


      Close Eyes and Sleep Well

      Now I am done with everything! 😀 It’s time to get deep into the good night sleep. Whatever problems, worries, tensions I have, I just throw them away, take a big breathe and sleep calmly. Once you are done with the above mentioned skincare/haircare steps, automatically you will be getting a happy refreshed sleep.
               
      And in the morning..?? Someone is going to wake up with gorgeous skin and hair 🙂 If followed every night, you can visibly see changes on your skin and hair appearance.

      Did you like my bed time beauty routine? What is yours? Share below!

      Image Source: 1, 2, 3, 4, 5, 6, 7, 8

      How to Make Banana Milkshake Hair Mask?

      How to Make Banana Milkshake Hair Mask at Home? [DIY]

      Hello Everyone!
      How are you all? It is been very long since I posted anything on MABH. I missed you all like anything and I am finally back. 🙂 Today, I am sharing with you all a super duper delicious eatable drinkable hair mask recipe made of fresh bananas and other kitchen available ingredients to serve your hair. I have been using this mask since 2 weeks and seeing greater results on my winter dry hair. It not only nourishes my hair, but also helps my hair turn soft and manageable when winter strips off all the moisture and leave my hair dry. The specialty of this milkshake hair mask is, you can have it for your tummy too 😀 Believe me, its delicious like anything when chilled. Shall we move on to the recipe now?

      • Read: DIY Hair Masks from Your Kitchen


      • Read: Avocado Nourishing Face and Hair Mask

      Things you will need:

      • 2-3 ripen bananas (Depending on the length and thickness of your hair)
      • 2 tablespoons of honey
      • A cup of milk
      • A teaspoon of sugarless milk powder (Optional)

      How to Prepare DIY Banana Milkshake Hair Mask?:
      Take a blender. Put in everything and blend until smooth 😀 Do you feel like drinking it right way? I felt like that too but spare some for your hair. Make the recipe thick but adding 2 tablespoons of milk at first; take out few scoops to use as your hair mask. Pour in more milk the remaining puree and shake it up to serve yourself 😀 Don’t forget to add honey instead of honey to this recipe and however, milk powder can be skipped. It is for extra nourishment of hair and for some extra taste. Let us store it in the refrigerator and move on to apply the hair mask. Meanwhile, you icy cold banana milkshake would be ready!

      How to Apply the Banana Milkshake Hair Mask?

      • Comb your hair and divide it into 4-5 sections.
      • Apply the banana hair mask using your hair brush or clean fingers.
      • Make sure to cover your entire scalp and hair ends with this DIY hair mask.
      • Wear a shower cap. Leave on the mask for 30 minutes to one hour and rinse thoroughly.

      Banana Hair Mask Ingredient Benefits:

      Banana: It hydrates hair and  makes it frizz free. Regular usage of banana in hair care helps in softening the hair by providing required moisture and nourishment.

      Honey: Honey is a humectant which attracts moisture and thus it helps hair in may ways. It also consists of anti oxidants, vitamins and minerals which are essential for the hair health.

      Milk: Proteins present in the milk help hair grow strong and shiny. This is why many hair care products contain milk as their key ingredient.

      Milk Powder: It has the same benefits as milk. Adding milk powder to the recipe helps nourish dry hair better by providing extra rich moisture.

      Tidbit: Make sure to rinse your hair well with fresh water to ensure the removal of mask residues. It’s better if you use this hair mask on pre-rinsed hair and avoid using shampoo immediately after rinsing the mask from your hair as it may strip away the natural nourishment.

      Now it is the time to have your chilled banana milk shake 😀 Enjoy!
      Let this winter be a joyful winter. Keep updated for more winter nourishing recipes for your skin and hair.

      Did you like this recipe of DIY Banana Milkshake Hair Mask? 

      Do you use banana in your skin and hair care DIY recipes?

      Image source: 1