Category Archives: Do it Yourself

How to Get Soft and Silky Hair in 2 Days at Home?

Hi everyone!

Are you going out somewhere in 2 days and need silky soft hair? Then you are at the right place. Today I will share my tried and tested DIY method of getting soft, silky, shiny and smooth hair at home!

Before you start reading the steps, remember that you need 2 days for this process after which you will have healthy shiny hair like never before temporarily. This is a tried and tested method. So let us proceed.

Note : To make your hair shiny in a day, do read Lancy’s DIY tutorial on Rose Coconut Hair Spa. It is easy, natural and makes your hair shine in few hours! You can also check her recent 6 month hair growth challenge results to know more about natural hair care!

Soft and Silky Hair at Home

Things needed:

  • Fresh Aloe Vera Gel extracted from the plant
  • Olive oil
  • Sunsilk Perfect Straight Shampoo/Any other mild shampoo
  • Dove conditioner/Any other conditioner
  • Silk and Shine Hair Potion/Livon/any hair serum (optional)


Steps::

1. Extract some Aloe Vera Gel directly from the plant, apply it to your dry hair, and scalp so that the gel completely covers them up! You need to do this in the afternoon time. If you do not have itchy scalp then skip this step. Keep the aloe vera gel for about 2 hours and then rinse it off!

If you do not have a aloe vera plant at home, I suggest you to try store bought aloe gels but make sure they contain less-to-no chemicals compared to the other ones. I suggest the Nature’s Essence Aloe Vera Gel and the new Khadi Natural Aloe Gel! (It is available in two variants – green & transparent!) I’d go with transparent!

I heard the Patanajali one is great too but I’m unsure if it can be used on hair! I suggest you to check the reviews before you decide getting it for this treatment!

If you prefer homemade (it is the best choice) then extract the gel from the leaves safely and do give this recipe a glance! Amoolya has shared the wonderful method to make this coconut aloe vera gel at home. It can be definitely used for this treatment!

Aloe Vera

2. At night, before going to bed, heavily oil your hair with some light oil like olive oil (Luke warm) and go to sleep. After waking up, remove the oil by using Sunsilk perfect straight shampoo and then apply Dove conditioner!

Olive oil
Dove Conditioner

3. Finally, let your hair dry naturally and comb your hair. After 40 minutes, you will see that the hair is becoming frizzy. Comb your hair once more to set it.

4. Touch your hair now 🙂 I am sure you hair it will feel extremely soft and bouncy and it will have a natural shine. You can apply Silk and Shine hair potion/Livon to your hair too after completing all the above steps for that extra shine and bounce.
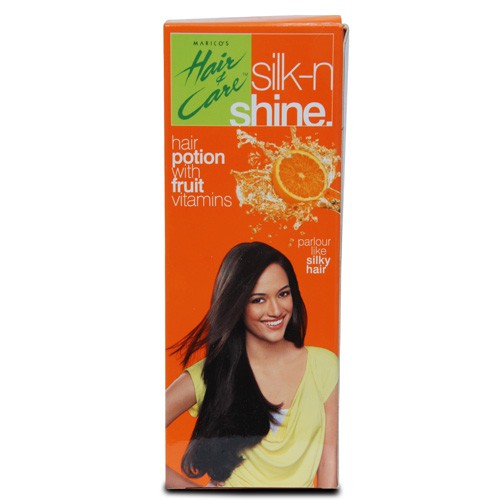
Silk and Shine Potion

I do this whenever I have to go out somewhere and it works perfectly! 🙂


Two Tips for Maintaining the Shine:

1. You an use Yoghurt (I know it sounds weird and yuck but it works) on your hair and keep it for 30 minutes and then shampoo your hair to remove the bad fragrance. Believe me, I have tried this as well. It works wonders, makes the hair soft, silky, shiny and healthy looking too.

Yogurt for Hair

2. Well, another tip from my side to maintain the shine of your hair is to use fenugreek mixed with some curd. I love this tip and I always apply a paste of Fenugreek to my hair and keep it for 45 minutes and then rinse it off. It helps to make the hair super duper shiny.

Fenugreek for hair

Finally, I will share with you a tip that I guess you hear everywhere. The tip is to maintain your diet. I know it is difficult but at least try to eat healthy food (fruits and lots of green veggies) one time a day! But that does not mean that rest of the time you can eat junk food. You should always eat home made food. You can cheat for one day in a week when you can indulge in anything you want!

For more experienced hair care diet ideas, do check THIS post!

Do you have any home remedy to make your shine? If yes, kindly share it below on the comment section!


 By Arpita

Image source: Google images
How to Make Acne Spot Removal Face Pack at Home?

By Radha

Hello Beauties,

Hope everyone is doing well. I am back with another wonderful DIY recipe today. This one is for removing acne and pimple scars from your face. I know very well that acne and pimple marks are such annoying problem for everyone. I was suffering from acne scars very badly. From my school days I do face acne now and then.

The sad phase of acne is that the scar left by acne. It makes our face look uneven and ugly. I got this magical recipe of DIY face pack long time back from my close friend 🙂 This DIY acne scar removal face pack does wonders if used regularly.

How to Make Acne Spot Removal Face Pack at Home?

 Things Needed:

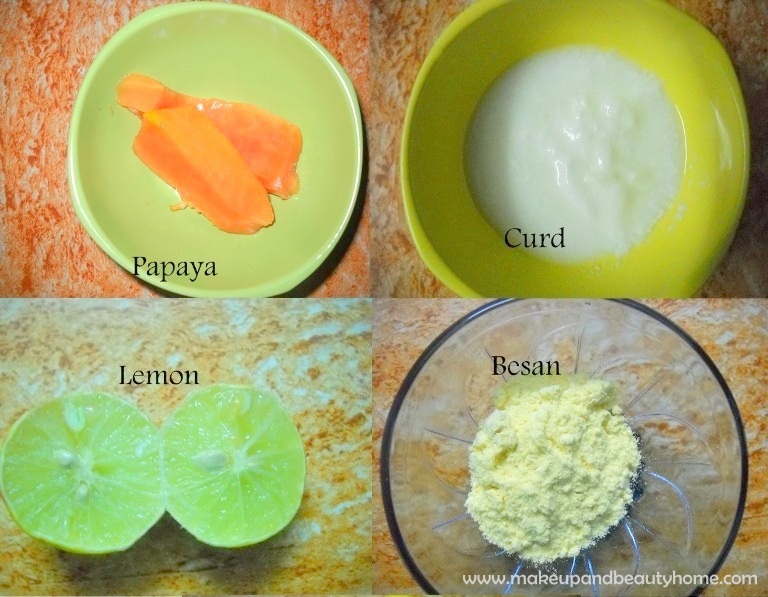
  • Pulpy Papaya  – I cube
  • Glycerine – 1 to 2 drops
  • Honey – 1 to 2 drops
  • Lemon – half
  • Curd – 1 teaspoon
  • Moong Dhall Flour – 1 teaspoon
  • A Clean Bowl and a Mixing spoon
How to Make Acne Spot Removal Face Pack at Home?

How to Prepare?

  • Take the bowl and squeeze the juice of papaya pulp to it.
  • Now, put in honey, glycerine, lemon juice and curd.
  • Mix all the ingredients; stir well by the spoon.
  • Now you will get a watery solution which is ready to be mixed with moong dhal flour.
  • Add moong dhal and blend well finally. Your anti marks DIY fack pack is all ready to use!
How to Make Acne Spot Removal Face Pack at Home?

How to Use?:

  • Wash your face will a mild cleanser and pat dry.
  • Apply the homemade acne mark removal face pack all over the face and neck evenly.
  • Application should be done downwards to upwards.
  • Leave on the pack for 15 minutes and relax.
  • Later, gently tap your facial skin with wet fingers and give a slight massage from your neck to face in the same downward to upward direction. After the massing process is over, wash off with your facial skin with cold water. You will see a glowing face with soft and smooth skin. Not only removes acne marks, this face pack will brighten your skin with regular usage too!

Ingredient Benefits:

Papaya pulp is rich in A and C vitamins which are very essential in skin repair process. Glycerine can moisturize the skin and restore skin’s natural moisture. Lemon juice also contains Vitamin C which can helps in removing scars and brighten the skin. Moong dhal flour is a great source of protein and moreover it can exclude the unwanted greasiness from skin and make it look fresh. It also has the ability of removing dead skin cells from your skin. Honey and curd have a good moisturizing power along with some anti-bacterial property which can fight against new acne formation. Curd and honey are the main ingredients in this face to impart radiant glow on the skin.

After using this acne spot clearing face pack, do not use soap on your skin for at least 5 hours. For better results follow this face pack usage 3-4 times a month. If you are allergic to lemon, you can exclude it from the ingredient list and add tomato juice instead.

Do you have pimple marks on your face? What natural ways do you follow to reduce them?

How to Make Grape Body Polisher at Home? (Steps and How to Use Info)

Anything that says home made takes so much of attention from me. That is why I always come here on MABH again and again with one or the other kitchen items. This time it is black grapes; it’s the grape season here now. And, this is another post I am making it sound partially like a cooking post. So sorry; but I have to mention the procedure of making the grape juice here.

Read: Exfoliating Body Scrub with Chickpeas

How to Make Grape Body Polisher at Home?

Prepare the Grape Juice First:

Half or one kg of black grapes, sugar and water.


How to Prepare?:

  • After cleaning the grapes well; in a wide vessel boil all of the black grapes with enough water. Water quantity should be little above the level of the grapes in the vessel.
  • Boil for about 15 minutes or until you find the grape pulp has been loosened.
  • After it cools, pour all the contents on a strainer and collect the juice in a different vessel. The grape peel, pulp and seed will be collected in the strainer.
  • Add sugar to the collected juice and refrigerate for further cooling. There; black grape juice is ready
How to Make Grape Body Polisher at Home?

Now, the contents in the strainer are of no use in the juice drink. But it is the key ingredient for our body polisher. The seed can be separated out easily. The pulp forms the base of today’s body polisher.


Recipe:

How to Make Grape Body Polisher at Home?


Read: Instant Skin Brightening Face Pack with Grapes


Main ingredients:

One fist full grape pulp, dried and crushed grape seeds and one spoon honey


How to Make?:

  • Wash the seeds in water and dry it under sunlight. (Just 4-5 hours of exposing to sunlight is sufficient for drying.)
  • Crush the seeds to form a scrub like granules and store it in an air tight box.
  • Take a fist full of the pulp in a separate container and mix it with one spoon honey.

Done. Grape pulp and honey forms the body massage cream; grape seeds powder forms the body scrub particles. Together everything forms a home made body polisher.


How to Make Grape Body Polisher at Home?


How to Use?:

I use this body polisher after bath. Firstly, massage for about 3-4 minutes with the mixture of grape pulp and honey. And then for another 2 minutes I use the grape seed powder for scrubbing of the skin. Then wash off everything with water. No soap or body-wash after using this natural polisher.

This way I do not need any moisturizer or body lotions after bath.

There is one thing I feel sad about the grape pulp. It cannot be stored for long. It can be refrigerated and saved for another 2 days or so. It cannot be stored for long months. But; the dry seeds can be stored for as long as you want. I am planning to use it in my facial routine too.

I hope this was interesting. Enjoy every body the season of grapes as of now! I am definitely enjoying. 🙂 So, do you use Grapes in your skincare routine? If yes, share your recipes below!