Author Archives: Lancy

About Lancy

Hi, I am Lanceek Cv. You can call me Lancy. 😊I found MABH as a teenager in 2011 to write about about beauty, haircare, and anything else I found curious about as a little girl. Now in 2026, the blog has grown with me. I'd love to share everything I find beauty in - my DIY projects, home decor, product reviews, food I cook, my random thoughts and hobbies. (hosting & antiquing lately).Write an email or drop a comment. I'd love for you to not be a stranger anymore. 💗

How Important Is Oiling Hair? Facts and Secrets

by Arpita

Let us all admit it. We all hate oiling our hair because it makes the hair sticky and messy. However, I am here to encourage you to oil your hair at least once a week. I am going to tell you about some facts and secrets about oiling your hair.

  • Read: Parachute Advansed Ayurvedic Hair Oil Review
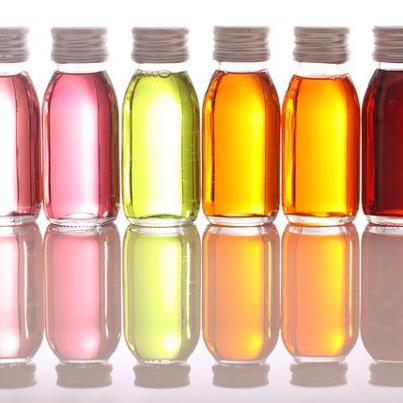

Mustard Oil, Olive Oil, Coconut Oil, Amla oil, Castor oil, Jojoba, Tea tree oil! There are so many oils, which can help us achieve smooth and silky hair. Oiling your hair is the best way to get Mother Nature’s touch in getting strong hair. I, myself, am a mother. I regularly oil my daughter’s hair, and she has quite strong hair. Without oil and moisture, you hair might turn dry, rough resulting in hair loss.

Facts and Secrets of Oiling Hair

1. You can use Castor Oil on your hair every night and then rinse it off in the morning. Believe me; your hair will become really strong and shiny! However, to rinse it off, you must use a good quality shampoo and follow up with a conditioner. Castor Oil has an anti-microbial action and is rich in fatty acids!

2. Amla oil used once every week prevents premature graying of hair and it helps in preventing hair loss and treats hair damage. Our hair goes through a lot of damage over the week and using Amla Oil helps to maintain your natural hair color.

3. You should not use lots and lots of oil to coat your hair. Applying a thin coat of oil to the hair is the best way to oil your hair. Also, warming up the oil a bit before using it also helps a lot.

4. Well it is a myth that oiling your hair will help in growth of the hair. Oil just acts as a hair conditioner and a hair oil massage helps in relaxation. The oil that acts as a conditioner does help in preventing dryness and thus in turn preventing hair loss to an extent.

5. Coconut oil strengthens the hair as it contains calcium, iron, etc. that help in moisturizing the hair and repairs damaged hair too. This does help in making the hair strong. Jojoba oil is also beneficial as it makes the hair soft and properly moisturized. Olive oil is also helps to make the hair silky and cures dryness of the scalp.

I guess you got the basic facts about Oiling Your Hair! Do try these out and let me know if it helped you 🙂 It was a small try from my side to explain that oiling the hair is beneficial. If you ask me, my personal favorite is Olive Oil.

How many times do you oil your a week/a month? and Which oil do you use?
Image source: Google images

Say No to Tanning While Riding Your Two Wheeler

Hiee MABHians,

Today, we are seeing several women on road riding bikes and scooters than past years. I turned 18 years old last month and got a scooty for myself 😀 Only after getting a scooty, I realized the skin and hair problems faced by two wheeler riders. I am not sure about colder cities, but cities like Chennai, Delhi and Hyderabad has the worst-est summer! Believe me, If a hen plans to take sun bath in any of these cities, after sun bath it will turn into grilled chicken! That much hot the weather is even in the beginning of summer.

Sunscreens!? What happened to sunscreens? Sun smiles at the sunscreens sarcastically. Even if the SPF is 100 with thousand +s, you cannot escape from tan in Chennai’s summer.. It feels like being inside oven outside!
I feel to run away somewhere from Chennai. Though I live in a coastal area, the domination of sun is high here. For the last 20 days, I traveled in my two wheeler to school [My board exams are going on] and the result is, badly, horribly, unevenly tanned skin! I love to have a chocolate-sh complexion but this kind of tan looks very ugly on me. That is because I did not follow any precautions while driving. Now I understood what I should do to prevent my skin from sun while driving and those are what I am going to share with you all two wheeler riders now. Go ahead and read below!

Helmet is a Must!

Wearing helmet while driving is not only a government rule but also a ‘skin rule’. You may think ‘what is going to happen to my skin if I don’t wear a helmet?’ but yes! Your skin turns uneven, dark and unhealthy if you ride without your helmet. Listen how. Without helmet, the heat will directly pass into your body. When your body turns excessively hot, your skin turns dull, unattractive and aged soon. So never ever ride your bike without your helmet even if it is a 10 minutes short drive.

Get a Scarf

Cover your face and head with a scarf or a shawl before starting your bike. Nowadays, triangle shaped scarfs are available in markets for this purpose itself. Cover everything except your eyes like a Ninja 😀 Wear a scarf and put your helmet on! This will prevent tanning 100 times better compared to your sunscreens.


Wear Your Sunglasses

I have a friend who wears helmet and scarf without fail whenever she is on drive but with regular driving, she got bad and very obvious dark circles. The reason is, she did not wear sun glasses. So the sun rays affected the areas around her eyes with tan, dullness and under eye circles. Now she’s badly trying to cure her dark circles. Prevention is better than cure, right? So, get a good branded sunglasses and wear them without fail while riding bike. If you are a spectacles wearer, then wear day and night glasses. You can get sun glasses with prescribed power too.


Cover Yourself

We girls usually like to wear soft, loose cotton dresses in summers. I personally prefer short sleeve dresses and skirts! In that case, we must save our body skin from heat and tanning while riding bikes. I am sure that your sunscreens will cheat you in Chennai’s summer so just don’t depend on them. Get a jerkin and wear it while driving. Wearing jerkin may be a pain in hot summer but it is nothing compared to buying anti tan products, bleaching skin and worrying about tanning for months. One time prevention will save your beautiful skin from angry sun!


Gloves and Socks

It is not just enough to save your body skin from the sun. Who wants dry rough hands and ugly feet? No one. Right? So get a good pair of hand gloves and socks. Put on some moisturizer on your hand and wear your gloves before driving. I got the world’s worst hands in just one week of driving without gloves. So be aware girls!


Don’t Skip Your Sunscreen

I feel like you questioning me ‘Now I have covered everything including my eyes.What else to do?’ Still the process isn’t over 😛 Put on your sun screen 30 minutes before you follow the above processes. Yeah, you read it right. It’s help is just 2% compared to the other skin savers above but you may walk from the parking area to your office without your helmet, jerkin and gloves. That 5 minutes is enough for the sun to tan your skin. At this point, your sunscreen will help you. So wear it! 😀

By following all these ideas above, you can forget about the skin tanning problem in summer!
This might look like a long process but it is not that hard to follow. Follow the ideas, save your skin and have a happy ride cheating Mr. Sun!

Image source: 1

Beginner Eye Makeup Basics – Step by Step Tutorial

Hello girls,

Eye makeup is such an easy and of course an enjoyable task to do. I am neither a pro nor a beginner in eye makeup. I have my own style when it comes to eye makeup. As a beginner, I used to struggle a lot with confusions while doing eye makeup. Which one to apply first? Mascara or eyeliner?; Should I curl my lashes first then apply mascara or mascara should come first?; These are the examples of few of my confusions.
Eyes are the beautiful part of a girl’s face which expresses grace and power. Every girl loves to keep her eyes beautiful at the maximum. For that, she needs a little amount of eye makeup. Many women hesitate to do eye makeup as they fear they might end up doing it wrong resulting in a bad eye look. That kind of fear is unnecessary. Come let us check few basics of eye makeup for beginners! You don’t need to be a pro to apply eye makeup. Even eye makeup beginners can rock with their own style following some simple steps!

Things you will need:

  • Under eye concealer
  • An eye shadow base or a primer
  • Eyeshadow or Eye pigments
  • Highlighter
  • Eyeliner
  • Eyelash Curler
  • Eyebrow pencil
  • Kajal
  • Mascara

How to Apply Eye Makeup for Beginners?

Concealer:

After cleansing your eyes, concealing is the first step to do when it comes to eye makeup. Take a bit of your favorite concealer and apply under your eyes. Remember, the shade should match your skin tone near your eyes. Gently spread it with a concealer brush without streaking. Conceal the darkness or under eye circles around your eyes with the concealer, if you have any.

Primer:

An eye primer is the essential key that makes your eyeshadow stay long with a vibrant glow. If you do not have a primer, use a good eyeshadow base. Your eyeshadow base must blend naturally into your skin without being any chalky. This step is very important if you want your eye makeup to be bright and stay for a long time.

Eyeshadow:

Pick your favorite eyeshadow first. Matte colors with or without subtle shimmers will do good for day time makeup and the extra shimmery ones make your eyes glitter in night looks. Choose your eyeshadow according to your dress color. For office wear, choose natural subtle colors rather than going for vibrant ones. If you are an expert in applying double shades on your eyes, you can apply two shades and match them up or just go for a single shade. Give a light washout of eyeshadow on both your eyelids.

Highlighter:

After applying the eyeshadow, highlight your brow bones with an highlighter to make your eyes look bright and vibrant. You can also highlight the inner corner of your eyes with a light shaded eyeshadow after putting on your eyeliner. This make your eyes more open and sharp.

Eyeliner:

When the above steps are done, take your eyeliner, in black or may be in some other color and line your eyes from the inner corner to the outer corner. As per your convenience, choose a liquid, gel or pencil eyeliner. Make sure you eyeliner is waterproof. After applying your eyeliner wait for few seconds and allow it to dry. Applying eyeliner and immediately curling the eye lashes will mess the look of your eyes

Eyelash curler:

This step can be skipped if you are blessed with long curly eyelashes but still, using an eyelash curler will bring enormous change in your eye makeup look. It make your eyes pop up like anything and gives that ‘beautiful girly eyes’ effect. Curl your eyes carefully without hurting your eyes.

Eyebrow Pencil

If you have uneven, thin eyebrows, adjust them with a dark brown or black eyebrow pencil. Make sure not to fake it. Hold the pencil slantingly and give milder strokes to achieve a natural look.

Kajal:

Apply a waterproof, smudge proof kajal/kohl on your lower lash line and water line to give your eyes a defined look. You can skip kajal if you do not prefer it.

Mascara:

This is the last, but not the least important step in eye makeup. Mascara volumizes and lengthens your eye lashes and make your eyes look beautiful! Believe, it make your eyes more ‘beautiful’! Choose a water proof mascara which doesn’t clump. Wait for few seconds and allow your mascara to dry.

That’s it! You’re done with your eye makeup now. These are the essential steps of a perfect eye makeup. These are not the compulsory steps; you can skip one or few of them which you don’t prefer. If you follow these steps perfectly, though being a beginner, you can rock like a pro in eye makeup. All the best!

Image source: 1, 2, 3, 4