Hi everyone!
Are you going out somewhere in 2 days and need silky soft hair? Then you are at the right place. Today I will share my tried and tested DIY method of getting soft, silky, shiny and smooth hair at home!
Before you start reading the steps, remember that you need 2 days for this process after which you will have healthy shiny hair like never before temporarily. This is a tried and tested method. So let us proceed.
Note : To make your hair shiny in a day, do read Lancy’s DIY tutorial on Rose Coconut Hair Spa. It is easy, natural and makes your hair shine in few hours! You can also check her recent 6 month hair growth challenge results to know more about natural hair care!
Things needed:
- Fresh Aloe Vera Gel extracted from the plant
- Olive oil
- Sunsilk Perfect Straight Shampoo/Any other mild shampoo
- Dove conditioner/Any other conditioner
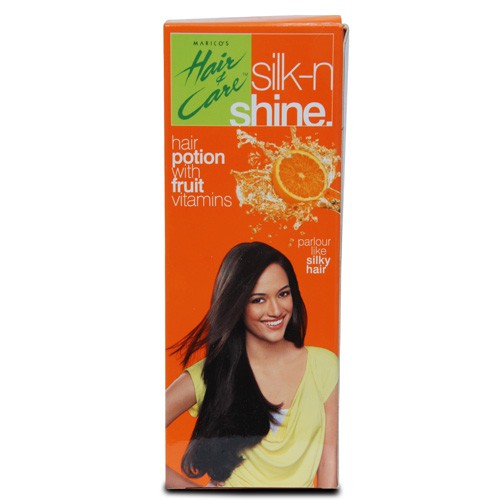
- Silk and Shine Hair Potion/Livon/any hair serum (optional)
Steps::
1. Extract some Aloe Vera Gel directly from the plant, apply it to your dry hair, and scalp so that the gel completely covers them up! You need to do this in the afternoon time. If you do not have itchy scalp then skip this step. Keep the aloe vera gel for about 2 hours and then rinse it off!
If you do not have a aloe vera plant at home, I suggest you to try store bought aloe gels but make sure they contain less-to-no chemicals compared to the other ones. I suggest the Nature’s Essence Aloe Vera Gel and the new Khadi Natural Aloe Gel! (It is available in two variants – green & transparent!) I’d go with transparent!
I heard the Patanajali one is great too but I’m unsure if it can be used on hair! I suggest you to check the reviews before you decide getting it for this treatment!
If you prefer homemade (it is the best choice) then extract the gel from the leaves safely and do give this recipe a glance! Amoolya has shared the wonderful method to make this coconut aloe vera gel at home. It can be definitely used for this treatment!
2. At night, before going to bed, heavily oil your hair with some light oil like olive oil (Luke warm) and go to sleep. After waking up, remove the oil by using Sunsilk perfect straight shampoo and then apply Dove conditioner!
3. Finally, let your hair dry naturally and comb your hair. After 40 minutes, you will see that the hair is becoming frizzy. Comb your hair once more to set it.
4. Touch your hair now 🙂 I am sure you hair it will feel extremely soft and bouncy and it will have a natural shine. You can apply Silk and Shine hair potion/Livon to your hair too after completing all the above steps for that extra shine and bounce.
I do this whenever I have to go out somewhere and it works perfectly! 🙂
Two Tips for Maintaining the Shine:
1. You an use Yoghurt (I know it sounds weird and yuck but it works) on your hair and keep it for 30 minutes and then shampoo your hair to remove the bad fragrance. Believe me, I have tried this as well. It works wonders, makes the hair soft, silky, shiny and healthy looking too.
2. Well, another tip from my side to maintain the shine of your hair is to use fenugreek mixed with some curd. I love this tip and I always apply a paste of Fenugreek to my hair and keep it for 45 minutes and then rinse it off. It helps to make the hair super duper shiny.
Finally, I will share with you a tip that I guess you hear everywhere. The tip is to maintain your diet. I know it is difficult but at least try to eat healthy food (fruits and lots of green veggies) one time a day! But that does not mean that rest of the time you can eat junk food. You should always eat home made food. You can cheat for one day in a week when you can indulge in anything you want!
For more experienced hair care diet ideas, do check THIS post!
Do you have any home remedy to make your shine? If yes, kindly share it below on the comment section!
By Arpita
Image source: Google images


.jpg "How to Get Soft and Silky Hair in 2 Days at Home?")
.jpg "How to Get Soft and Silky Hair in 2 Days at Home?")
.jpg "How to Get Soft and Silky Hair in 2 Days at Home?")
.jpg "How to Get Soft and Silky Hair in 2 Days at Home?")


