Vaseline Lip Care Rosy Glow Strawberry Frost Review

by Dharu

All I knew of Vaseline in lip care was their petroleum jelly until I saw this pretty pinkish red tube on their counter. I always trusted Vaseline; I was new to lip glosses so I picked it up.  Believe me now I have so many lippies but the first ever was lip gloss only. Guess we have few who always got their hand first on glosses and then go for lippies 😉

Product Description:

  • Soft pink tint and glossy lips
  • 24 hour moisturised lips

How to Use?:

Apply it on top of your lipstick or bare lips for a soft pink tint

Price:

Rs. 60 with shelf life of 2 years.

Shade Reviewed: 

Strawberry frost

My Take on Vaseline Lip Care Rosy Glow Strawberry Frost:

Packaging: It comes in a plastic transparent tube, with a transparent screw cap with a slanted tip as usual. The strawberry frost is the only variety available in this one. Also you can’t find that name anywhere on the tube but only on the outer cover. Totally beats me.

Colour: It is a beautiful strawberry red but more pinker. It has golden shimmer in it. Seriously why golden shimmers? The tint is really good but very subtle. I won’t advice using this without at least a swipe of your lippy.

Texture: The texture is extremely glossy but it is the first ever lip gloss which didn’t feel sticky to me. So Yay! But the gloss always gets separated from the color so it has to be shaken before use.. feels like tonic doesn’t it?

Staying Power: The lip gloss disappears immediately as you eat something so but if not it stays for 5 hours if you are not talkative. I used it to travel to Bangalore one and it stayed for 6 hours. And the moisturisation stayed for 8 hours that is if you are not using your mouth in any way. It was a night journey so otherwise it only stays for 4 hours maximum.

Fragrance: This is the good part. Strawberries all the way. Yummy!


On My lips:

I have worn this without anything. See it barely gives tint. My bottom lip colour is better. God I got pigmented so badly guys on my top lip which is increasing day by day even if I moisturise them and scrub regularly. Any suggestions?

Why I like this Lip Balm?:

  • Excellent pinky red colour
  • Non sticky to me at least
  • Easy on pocket
  • Non pigmented lips (Like mine a year back.. crying) will love this
  • Smell is so yummy
  • Easily available
  • Good moisturisation if your mouth is not busy (wink)

Why I don’t like this Lip Balm?:

  • Pigmentation is not so good
  • Highlights pigmented lips see how mine look here.. Crying again
  • The name is not given on the tube so a bit confusing
  • Disappears as you eat something
  • Only one shade is available so why have the pain to give it so many names?

MABH Rating: 3.5/5

Do I Recommend?:

Ya may be for starters in lip department who are looking for slight tints to check with their colours. It can be worn on top of a lip stick. No sticky lip gloss lovers and not for talkative ladies. Sorry girls I love you but Vaseline doesn’t seem to (wink)!

Would I Repurchase?:

I don’t know. This is going to take time for me to finish. I am more a matte lip lover! See how much is left still?
Gradient Eyeliner : Step By Step Tutorial with Photos

by Adi

Hi girlies!
Well what do you know, I am here with my first ever tutorial for you girls! If you’re an eye makeup gal, this tutorial is definitely for you 🙂 In this post, I will be trying to teach you how to jazz up your eyeliner by creating a gradient effect! I am a bit bored of colored eyeliners and I have so many that I always look for new ways to use them.

This is a great way to put all your coloured eyeliners to good use and it is quite simple. So let’s get into the tutorial 🙂

You will need:

  • Any two coloured pencil eyeliners of different colours
  • A blending brush or any brush or smudger to blend in the eyeliners

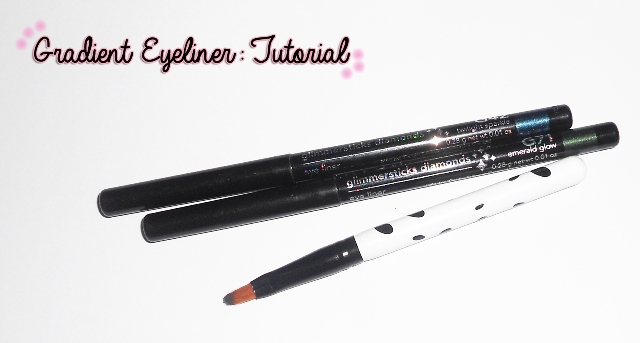
For the purpose of this tutorial I will be using the Avon Glimmersticks Diamonds eyeliners in Twilight Sparkle and Emerald Glow. These are great picks for this tutorial because though they are smudge proof, they take a minute to ‘set’ so I can work with them. You girls can also use smudge-proof eyeliners but be sure to pick those which take a minute or two to set so that you can smudge them before that because as you will see, smudging the eyeliners is crucial for this tutorial.

To blend in the two colors I will be using an ordinary blending brush from some random brush set my mom picked up 😛

Step 1: Take one eyeliner pencil and draw a smooth, even line across your eyelid about two thirds of the way.

Step 2: Using a blending brush, soften the inner end of the line – smudge it to make it less opaque. The idea is to avoid harsh lines. The colors should look like they disappear into one another.

Step 3: Starting from the opposite corner, using the other eyeliner pencil, draw a line till it meets the first line, make the two lines overlap to create a gradient effect.

Step 4: Touch up the two lines wherever required, and that’s it! You’re good to go 🙂

Here are a few useful tips for this tutorial:

1. Blending is the key. Harsh lines or noticeable lines where one colour ends and the other begins, will totally ruin this look so you must blend well! For this tutorial I didn’t have to blend too much because the colours were close, you will need more work if the colours are contrasting.

2. For subtle looks choose colours close together like deep blue and deep green that I chose for this post. For bold looks go for absolutely contrasting colours like blue and orange!

3. It is okay if you don’t have a blending brush. You don’t necessarily have to use a brush. If you are more comfortable using a Q-tip to smudge the colours, by all means go ahead with that.

I really hope you girls liked this post 🙂 stay beautiful and stay trendy 😀

Avon Nail Pro Nail Polish Sweet Mint Review, Swatches and NOTD

Hi All!

Again I am here with one more nail polish review and this time it is from the brand Avon. Avon is a very well known cosmetic brand among all of us. Actually I had owned this nail paint at one of my fellow blogger’s space. I must say it is a very pretty shade. Most of us loved bright color nail paints and this one what belongs to that group. Well read the below lines to know more about it.


Price: 

Rs.119 for 8 ml


My Take:

It comes in a regular square packaging which is quite sturdy. It has a good quality applicator which gives opaque coverage after 2-3 coats.

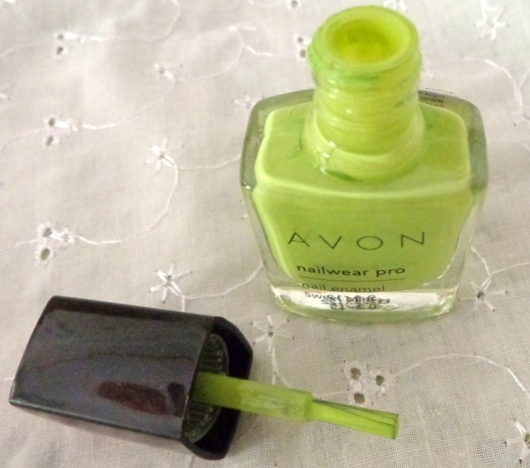
Sweet mint stands for something related to green and that’s what the nail polish shade is. It is a very bright parrot green color. The texture of the nail paint is very thick and creamy but still needs 2-3 coats for best opacity. Due to its thick texture I found it a little difficult to get the even application.

All points are good but the biggest problem with the nail polish is that it doesn’t dries quickly. When you apply the first coat it is okay and dries quickly, but in the second coat it is a headache to dry. You have to wait for at least  half an hour or more and  after applying 2-3 coats it looks so tacky. I personally don’t like it.

The staying power is very low. After 1-2 days the nail paint starts chipping  from the top, but if you apply with a top coat then it may last for a day more. Anyway come to the up and down points of it.


Likes:

  • Nice eye catching color
  • Affordable price
  • Sturdy Packaging
  • Good quality applicator


Dislikes:

  • It takes long time to dry completely.
  • Only Available at Avon consultants


Rating: 3/5


Final Verdict: 

If you want to try some different shades, then it must be a try one.