Here is the most amazing hair treatment I use for my hair regularly. I have chocolate brown soft curls. Henna is something I use to use since my school days. I have been using brands like nupur and coronation but, they on usage made my scalp extremely dry, my hair rough and frizzy like crazy. After 5 years, now I got the perfect powder for my hair. This is completely homemade chemical free natural and better than any henna out there. Let’s see the procedure. Shall we?
You Need:
That’s all. I know some think it’s difficult to get but try and ask your maids. You will be pleasantly surprised
Procedure:
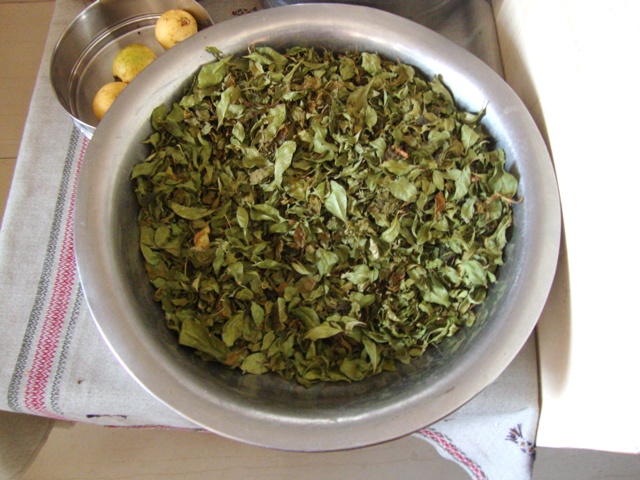
- Get the leaves from the plant. Make sure you don’t have small twigs in them.
- Dry them under sun till they are crisp like chips.
- Powder them in a mixer. Use the larger jar first you get to make powders and then the smallest jar. This way you will get the finest powder. Otherwise it will be a bit fibery when water is added.
- Store it in a dry air tight container. No water should come in contact with this.
- Tada.. You are done!
Extras:
You can add amla, hibiscus, methi or any other natural ingredient in powder forms only. It will add to the nutrients. I use hibiscus leaves. Dry them and add. Even the powder of dried flowers can be used. Curry leaves also make a great addition.
How To Use?:
Mix the powder around 4 spoons in an iron tava. Use curd or tea decoction only. Leave it over night. Add 2 egg whites in morning and apply all over dry and already shampooed hair and even on the roots. Cover yourself in a shower cap and let it work for 2 hours. It should not get dry. Rinse only with warm water. Dry yourself naturally and apply oil for an overnight colour sealing technique. Use pure oils only if possible. Castor oil works the best and after that almond oil works great too. Coconut oil or any other can be used. Wash in the morning with a good shampoo and condition your hair. Dry naturally.
The 4 spoons come for medium length and thick hair. I have just above chest line length hair and quite thick too. The henna swells after coming in contact with the water in tea or curd so it suffices. Curd if used gives a deep reddish brown tinge where as tea gives dark brown with slight red notes. Brown haired people can use teal for a shiny mahogany hair. Black haired can use with curd to give natural highlights to their hair. Concentrate on ends and the lengths than the roots for a natural gradient colour effect. My scalp is lighter so it looks honey brown and my ends mahogany brown.
Ingredient Wise Benefits:
Henna colours your hair, conditions, gives immense shine (refer to my clicks). It has healing properties and even heals any bumps or wounds on the scalp due to itching, dandruff and excessive scratching. We used to use it on fungal wounds, injuries for a scar less antibacterial treatment. It will help heal wounds without scars.
Curd is a very good anti dandruff treatment. The lactic acid will not only remove dead cells from you scalp, also smoothens your hair and locks the colour. It is a very good oil regulating agent for oily scalp.
Egg white is one of the best known anti frizz treatments for curly frizzy hair. The extreme protein content in it strengthens hair form roots to tips. It even seals splits.
Tea decoction works as a colour enhancer, anti oxidant, shining serum, smoothens and helps in damage
repair very well. I use tea instead of curd.
The iron form tava not only enhances the colour but also is extremely good for hair health. (You will notice a black substance in the morning after you mix it. Don’t worry it’s the iron seeping out because of the tea decoction working on the tava. It is very very good for the colour. Don’t ignore it)
My hair looks reddish coppery brown because of the direct sunlight but its deep mahogany actually.
The Differences:
Staying powder: The market henna as I have observed over years and I am sure many would have noticed, you can see your shampoo lather and water turning orangish every time you wash it. My henna stayed for a month solid without fading. I did notice a bit of colour the very next day but that was the residual powder left on my scalp not the colour loss from hair. Since I colour once every month, I noticed that the colour only got enhanced deeper and didn’t lose any.
Chemical Problems: Market henna uses food colours to give the colour where as natural henna is all natural. These food colours even cause skin cancer on prolonged usage and can even damage our nerve cells. (Not to scare you but please be sure to use it unless you don’t have any other alternative).
Other Side Effects: Over 5 years, my hair became extremely frizzy; dandruff which wasn’t in my history became a daily nuisance; redness and bumps all over my hair for excessive itching and scratching. I used lot of homemade treatments and commercial market ones but all of them got neutralized with the henna I used. As soon as I switched, my dandruff was gone in just 5 washes, hair recovered from damage and frizz with the help of tea and olive oil. My wounds are gone and scalp is clean as ever.
Benefits: Obviously homemade has more benefits in regard with nutrient content, softening, shiny, replenished hair recovering from damage. My splits have gone completely and I have not seen any since 5 months. I used to envy straight hair but now, I love my gorgeous curls to death. Thank you mama! It was her of course who helped me.
I hope you find this useful and any more doubts please feel free to ask. Also there is another homemade treatment for henna coloured hair which I will be doing soon. Stay tuned girls!