Author Archives: Dharu

VOV Colour Crayon Crème Eye Pencil Cobalt Green Review and EOTD

Hello everyone!

I love VOV products for their price range and good quality. I have been searching for something other than brown and black to wear on my eyes. I was fed up with the eye shadows I had since I wanted something easy to use and fall out was a head ache. So I went to my usual store where I get all good brands and was searching for vov nail pints when this caught my eye. I bought three other colours as well in blue, metallic blue and green.

Price:

Rs 60. Now I think its fifty only.


My Take:

Packaging: This eye pencil comes in a cobalt green hued pencil with an opaque cap. Sleek and cute it fits easily in your bag. It is a self explanatory color code.

Colour: It is amazing cobalt green. You may think this looks like olive green but let me clear one thing. Cobalt green is green with yellow or golden undertones where as olive green is green with brown undertones. It has tiny gold shimmer particles. Amazingly festive and will suit warm and cool tones since it has golden tones in it.

Texture: The pencil is very soft but won’t break so there isn’t a problem. One swipe gives immense color. It blends and smudges really well

Staying power: It stays for around 5 hours on my eyes without fading. Oily lids will have to use loose powder and then use it for good staying power

Fragrance: None that I noticed


On My Eyes ~ EOTD:

Description of the look: 

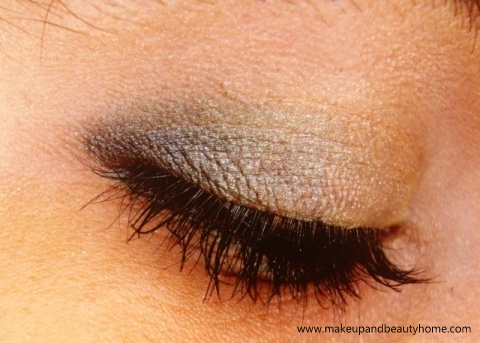
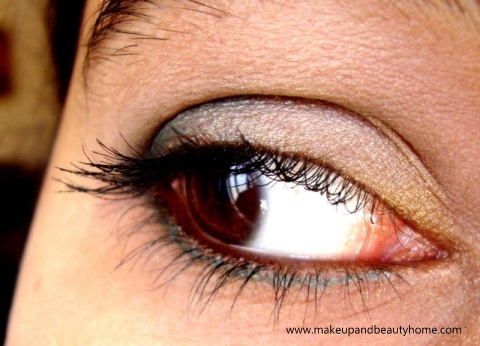
  • Golden eye shadow in the inner corner and VOV cobalt green eye pencil in outer corner smudged and blended together.
  • Kajal on water line and the same eye pencil on lower lash line.
  • I didn’t use mascara here but of course mascara can be added for more dramatic eyes.

It’s a soft festival look ideal for parties and traditional occasions

Why I like?:

  • Excellent colour
  • Good pigmentation
  • Staying power is good
  • Light on pocket
  • Travel friendly
  • Variety of colours available

Why I don’t like?:

  • Availability

Rating: 4.5/5

Do I Recommend?:

Of course yes! For a soft green look it is a must. As you can see it can be blended and can be used as an eye shadow as well. and no fall out yippee!

Would I Repurchase?:

Yes, I will.

My Homemade Black Kajal – Preparation Steps and Photos

Hello everyone!

We all know kajal from our childhood days. Well actually our moms applied kajal when we were babies but we don’t remember that. But Eyetex was the most famous brand for kajal that time. Now a days we have so many but of course none of them can give a run for money to eyetex in herbal kajal.

But, ask yourself. Are you sure the kajal you use is safe? None of the kajals today are herbal and most certainly not the non smudging ones. So here I got an idea to make a completely herbal kajal from home. This is the oldest recipe of kajal since from the ancient times written in ayurveda (well my grandfather read them in Vedas). Here is the procedure below!

Things You Will Need:

  • A copper plate with upward edges
  • A silver box (proper silver not steel)
  • Pure castor oil
  • Cotton threads made directly out of cotton which you use in pooja
  • Ghee
  • Spoon
  • A bronze deepam
  • camphor

Procedure:

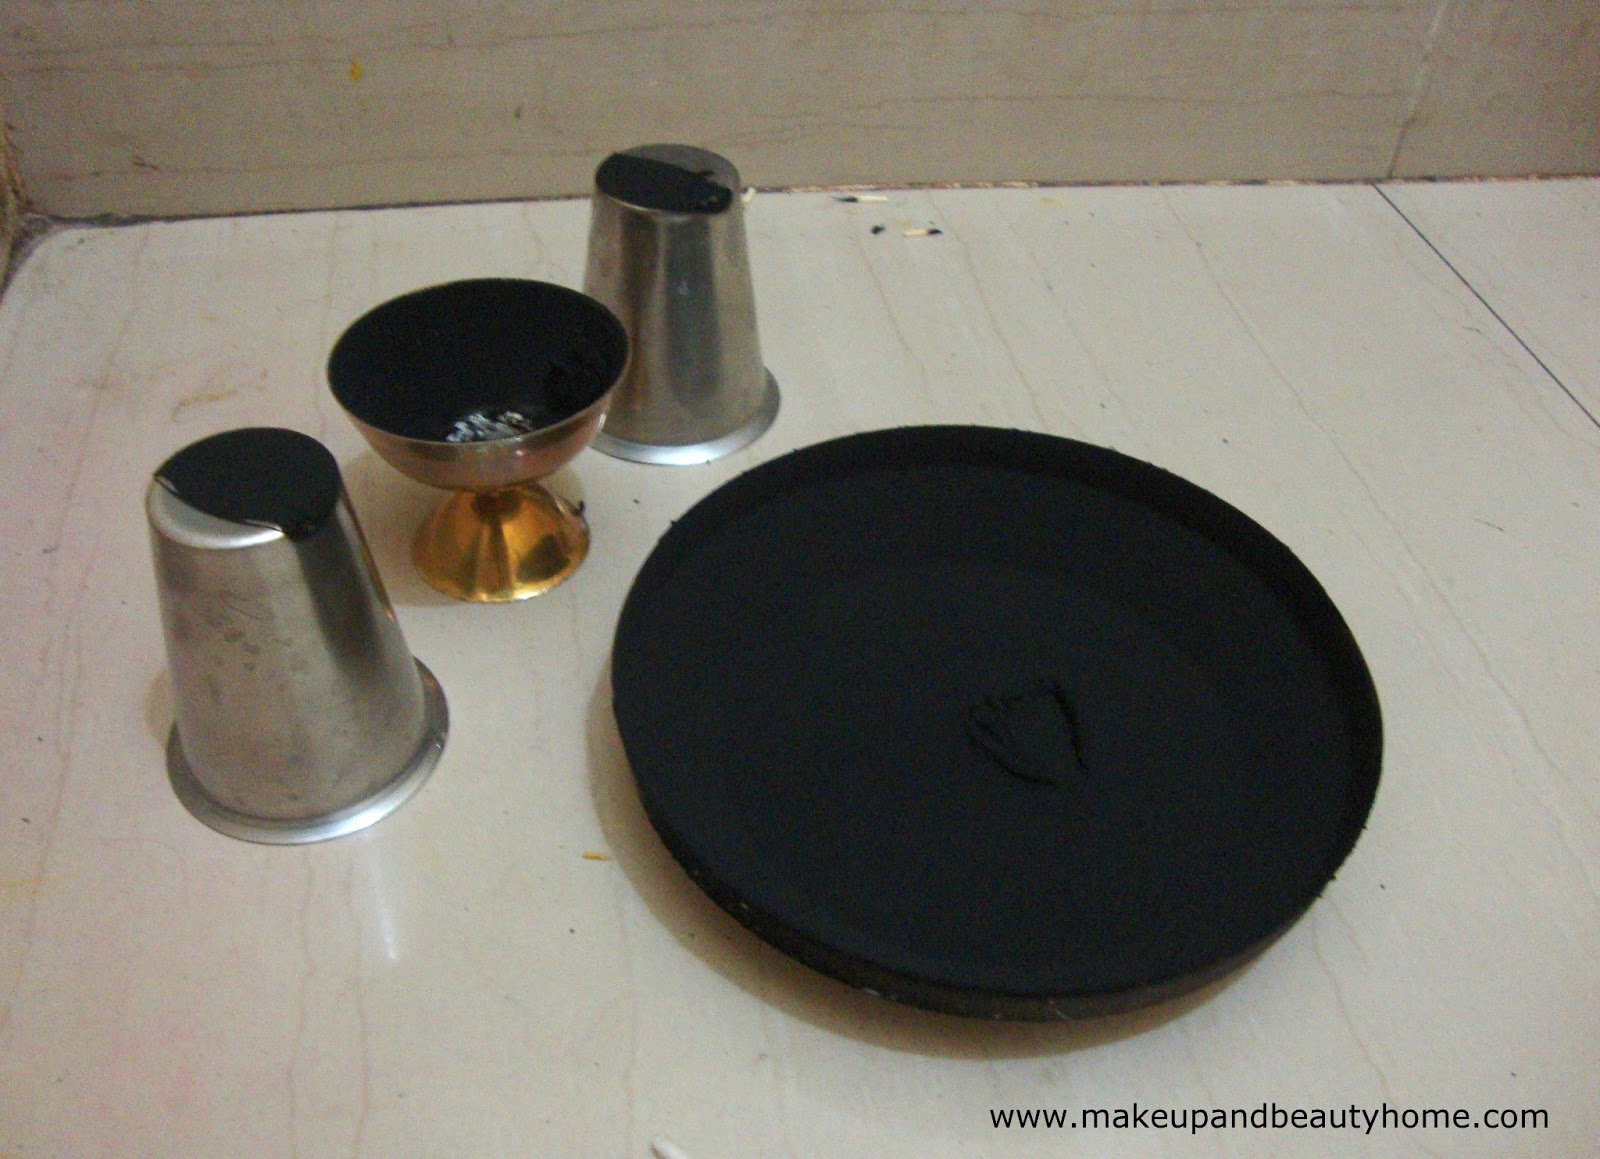
1. As shown in the figure, fill the castor oil around 100 ml into the bronze deepam. You can see the cotton deepam I used in the second pic. Take 3 or 4 and use this to light.

2. By using two tumblers, support the copper plate on top of the deepam and light it. (As shown in the first pic of this post!) Make sure the plate is a bit more in height than the deepam.

3. If you lie down and observe you can see the fire lapping at the copper plate making it blacker and blacker. Wait till it consumes the whole oil. Be careful as it will be very hot.

4. Now you see the ash collected in the plate and in the deepam? Collect as much as you can into a mixing plastic bowl.

5. Using little ghee, mix this into a paste. Add camphor sparsely. Don’t use more than 4 to 5 smallest beads the size of sugar crystals.

6. Transfer it into a silver box


DIY Kajal – On my Eyes:

Ingredient Benefits:

1. Pure castor oil is the richest form of vitamin E. It will heal your eyes, makes your eye lashes thick and blacker. Also relieves stress.

2. Copper is of course known for its healing properties and it’s a purifier. The minute copper essence what you get because of the heated plate and the ash collected. Keeps your eyes free from external infections and other makeup infections. It also helps in lens and eye muscle strength and relaxing.

3. Bronze and silver are again known for their regenerating properties. They also help in healing allergies, relaxing irritated and swollen blood vessels because of over rubbing.

4. Camphor for providing coolness and stress relief. It helps in minor eruptions in eyes.

5. Cotton being the most natural fibre available anywhere in the world.

6. Ghee keeps your dark circles at bay by relaxing them if you are an electronic person who uses laptops, computers, and phones constantly. It cleans your eye of salt deposits from tears. Also removes your minute makeup residue trapped under the upper and lower eye lids.

This kajal is also used to treat eye cataract, one of the most known eye disorders in elderly people. Eye cataract can make people blind and if you see that way, this is a boon. Each and every ingredient is a wonder medicine to your eyes.

The amount shown in the silver box comes easily for 8 to 11 months if used only by one person and one time application. It doesn’t expire guys; make sure you don’t get it near water. 🙂


How to Use?:

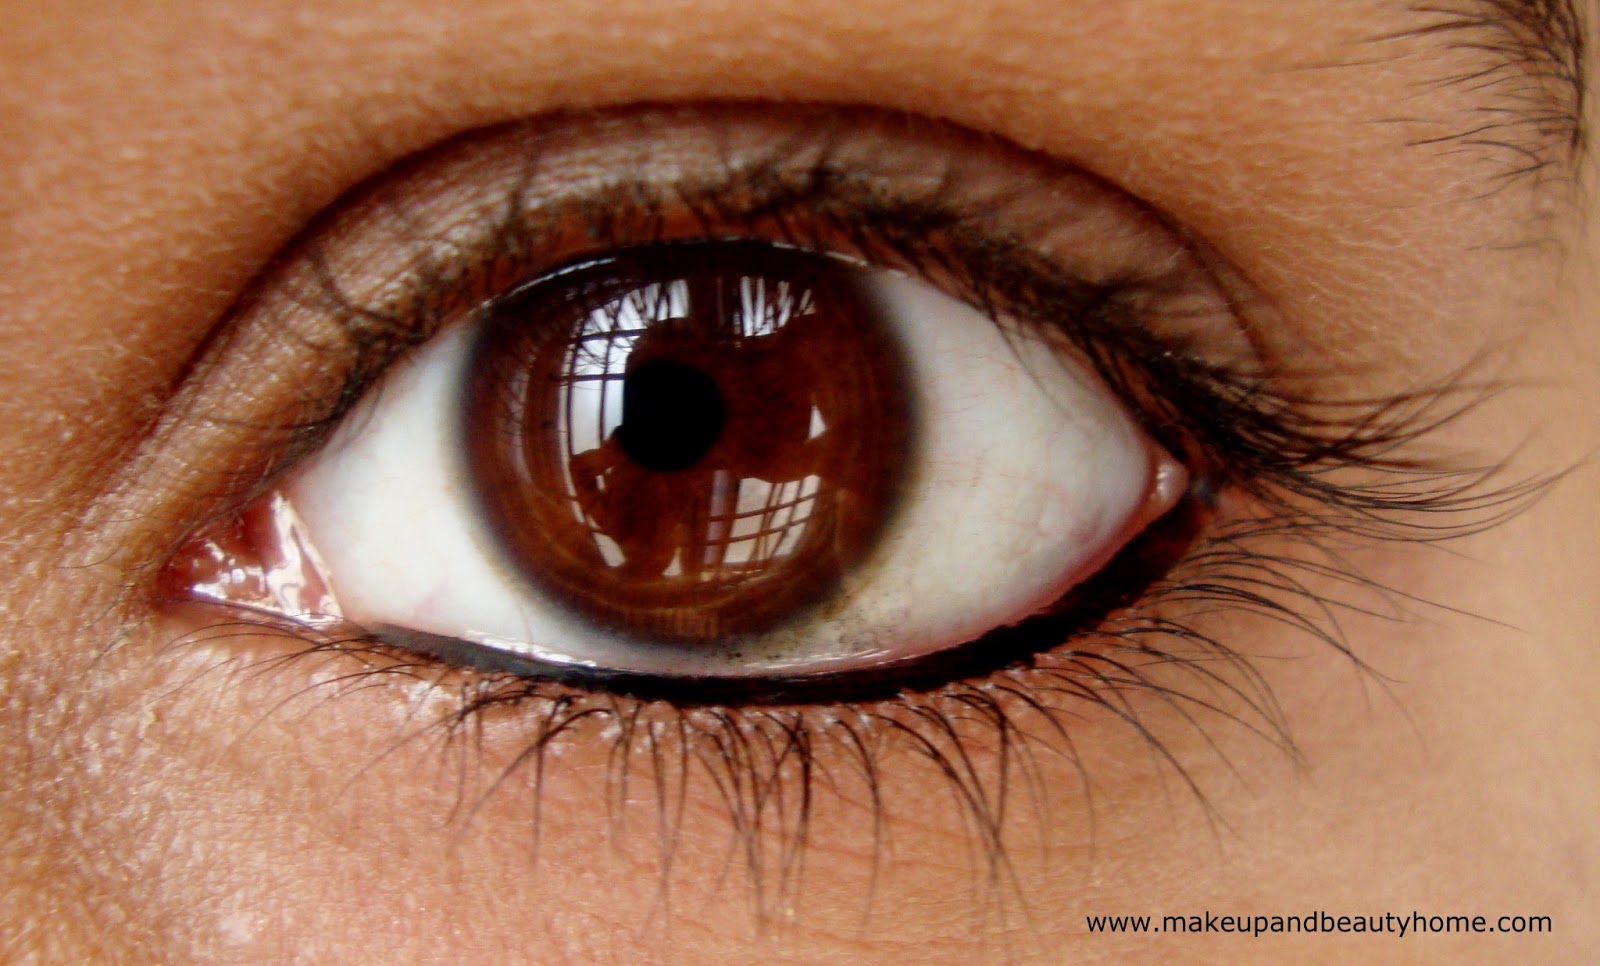
Use it just like a normal kajal. Use a match stick end if you don’t want your fingers messed up. Cut the head of the stick and use. Medicinally it is preferred to be used as a night treatment. This is how I use it. It gives pure black colour to your eyes. Dust powder after application to help with smudging. It smudges but as a night treatment, I can’t care less if you see the medicinal value it has. It is easily removed with the help of baby oil, or any oil actually.

After washing my face in the morning with normal face wash, I see my lashes have a faint black tinge in between them. It looks as if I already have faint kajal and it is really pretty.

Hope you guys like it! Any doubts.. Please give comments girls!

My Guide to Makeup Bases – Primers, Foundations and Concealers

Hello everyone!
This article is basically about bases. Those who love makeup and those who are not yet into it and for those who are starters like me, here is my complete guide about all the bases we use in makeup. Base is something that holds, extends, blends, protects, conceals your skin meanwhile preparing it to all the colorful art you do on your face canvas. A perfect base is a must for any makeup. So here it is!!

makeup basics, foundations, primers, concealers

Primers: This is the most basic of all bases. This is a foundation for the foundation. It is applied on top of your moisturizer before the foundation to basically start your everyday makeup. If you don’t have a good foundation but a good primer, this will help your makeup last longer and touch up free. There are many good brands like ELF, MAC, and VS to name a few. Also eye shadow primers come under the same category.

Foundations: Foundations come in various types – liquid, cake, air brush etc. Most frequently and popular form is the liquid. It is the most blend-able form of foundation. It gives medium coverage, controls your skin sebum, makes skin to look dewy, and evens skin tone Recent times, they have included sun protection in foundations so that it will be a one step process.

foundations, makeup bases

There are again types in foundations:

Tinted Moisturizers: These are basically moisturizers with a touch of foundation like Olay. These give moisture, one step process and also cover up your imperfections to give a dewy finish. Cost effective, and best for makeup starters, college going girls and ideal for dry skinned girls. These are light in coverage. These are not water proof.

Blemish Balms: These are the next step after tinted moisturisers, more focussed on coverage at the same time giving enough moisture. They are also sebum controlling ideal for oily skinned girls. Most popular brand is Maybelline. (Maybelline BB Cream and Maybelline BB Stick) These are ideal for office going ladies who prefer very light to light makeup. These are not water proof.

Souffle: These are water based light foundations. Very creamy and light to blend and gives matte finish. Gives medium coverage and can be cakey sometimes. They are not water proof. Big brands like Lakme are famous for these. Again a great choice for non made-up look and office wear especially for oily skinned girls.

Mousse: This is just like whipped cream, lighter, glides on extremely smooth because of the air whipped in. It’s more expensive than others but those who use it will swear by it. It’s ideal for dry skinned people and aged above 30 because of layered application and doesn’t settle in fine lines. It is applied in layers to give maximum coverage and control is better.

Liquid Foundations: These are the best, most available, more versatile in makeup. They are available in various varieties in every brand you can name. Comes in long stay, 24 hour stay, waterproof, water based, oil based etc for every type of skin out there. MAC, L’Oreal Paris, Revlon are said to be best. Now a days Lotus herbals is coming up with complete organic vegetarian makeup for sensitive skin and also since people are more focused on overall health than just caking up their faces. This type of makeup is best in case used on eyes. Apply with a wet sponge for best control and complete and perfect base.

Cream to Powder Foundation: This is not much known but gaining popularity these days. It is applied like a liquid which then becomes matte to give complete shine less finish. Ideal for oily skinned girls, companies like L’Oreal are producing such good ranges. You may be puzzled since it will first look like powder. It lasts whole day, easy in application and the main advantage being that you can skip compact as you will have full coverage.

Mineral Foundations: These are a hit now. They give next to air brush perfect finish. Skin looks dewy, moisturized. Ideal for sensitive skinned girls, they are made from minerals that don’t affect the skin in any way. These are slightly shimmery so has that natural glow. One can skip highlighters and bronzers while using mineral makeup.

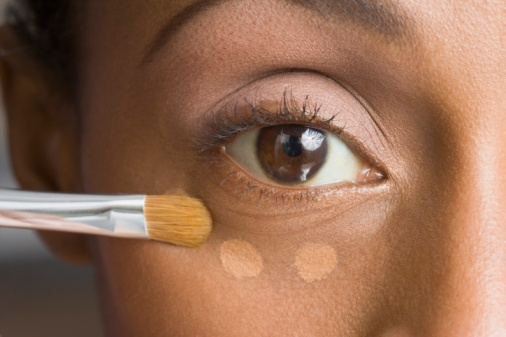
Concealers: As the name suggest, these are the enemies of your dark circles, blemishes, pigmentation spots, redness, dark spots etc. They are very thick but easy to blend and are a must for flawless skin. These come in neutral to tinted colours for every imperfection out there. Ask an expert as to which colour which colour compliment and choose.

concealer, makeup bases

General Makeup Tips:

  • Always always do CTM and only after that go on.
  • Always use upwards and outwards motion for blending. Circular motion for cheeks is the best.
  • While choosing the correct shade for you apply it along your jaw line towards you cheeks and onto your neck. This will help you out in perfect shade choice. Also always wear foundation on your neck as well. You don’t want to look like a clown with a white face and dark neck right. Don’t ignore the back of your neck if you are wearing a low cut dress.
  • While applying liquid foundation keep a small cup of ice cubes ready. Wipe your face first and then apply. This will close pores and it won’t clog or highlight your pores. Even try on for lipstick application.
  • Use rose water or aloevera gel for a dewy look. This helps in perfect blending and added moisture. Even oily skinned girls can use this tip as aloevera and rose water both are good in sebum control. This is my most HG tip in my makeup.
  • Use a brush to apply powder instead of sponge. It gives air brushed look. Trust me. Use the same for Concealers as well.


Read: Beginner Eye Makeup Basics

Which foundation and concealer do you use currently?